Hope this is of assistance.
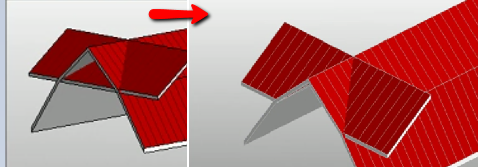
Revit extrude portions of a roof.
To resize the extrusion in the 3d view select it and use grips to edit it.
Click architecture tabbuild panelroof drop down roof by extrusion.
If you d like to learn everything about revit roofs you may be interested in my revit roofs masterclass course.
To raise or lower the roof from the reference level specify a value for.
You don t even need to sign up.
To view the extrusion open a 3d view.
You can use a combination of straight lines and arcs to create the profile.
We will go through the latter steps below.
In this revit architecture tutorial i show you how to create an extruded roof form using the roof by extrusion tool.
We will need an existing roof structure a new roof structure as well as an exact match to the portion of roof to be demolished.
Subscribe to the repro products channel.
Creates a roof by extruding a profile that you sketch.
In the roof reference level and offset dialog select a value for level.
This should keep you existing roof in tact and show a cut in the new construction phase.
The highest level in the project is selected by default.
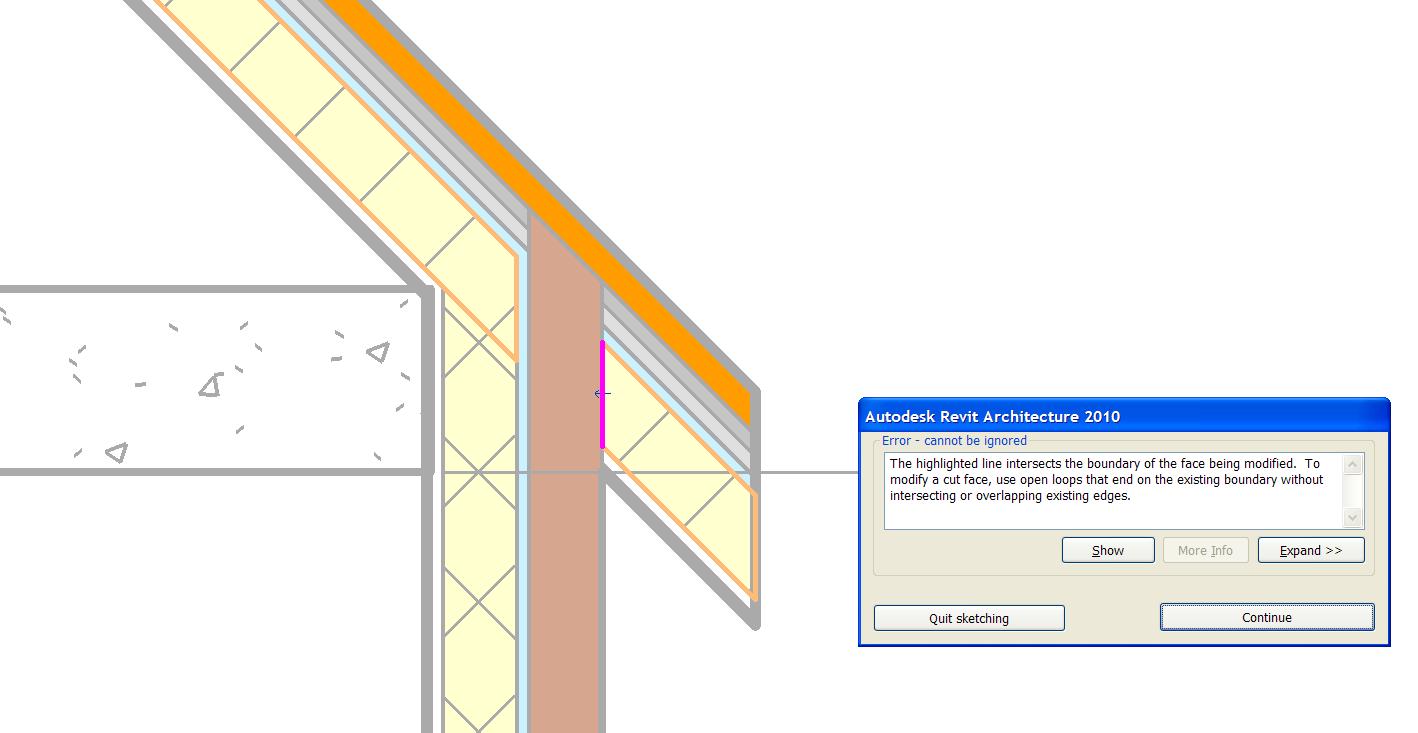
Create a void extrusion and make to required cut in the new construction phase apply the cut and done.
With the roof by extrusion method in revit you first sketch the profile of the top of the roof in an elevation or section view and then extrude the roof.
For the purposes of this tutorial i am going to use the following simple building.
Just enjoy the course and drop me line if you found it useful.
Revit roof by extrusion a how to guide presented by dzan ta autodesk elite expert repro products inc.
Specify the work plane.
Revit completes the extrusion and returns you to the view in which you started the extrusion.
Display an elevation 3d or section view.
If anyone is still looking for a solution you can make a roof cut into an existing roof using component model in place.
About creating solid and void geometry.