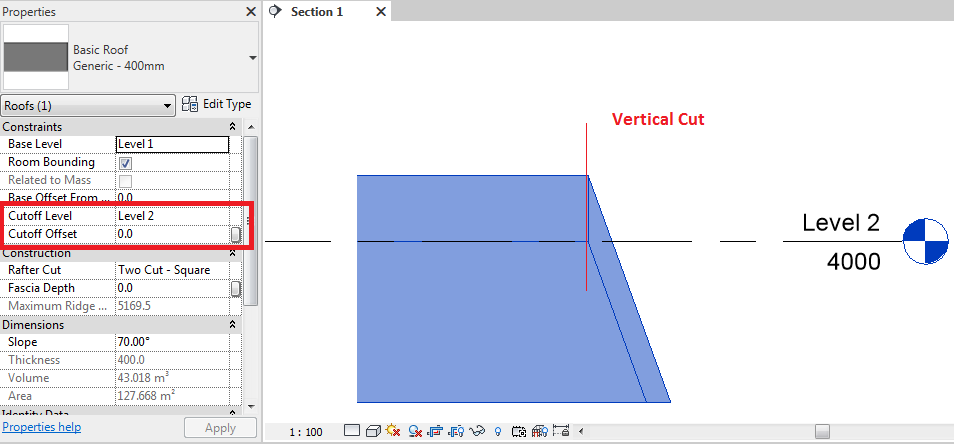
Revit Cut Roof At Height
Cutoff Level Roof Behavior In Revit Revit Products 2018 Autodesk Knowledge Network

Revit Tutorials Roofs Youtube

Revit Tips Spanish Roof Adaptive Insane Version Revit Tutorial Autocad Revit Roof

Trim Interscting Roofs Autodesk Community Revit Products

Create Roof Trusses With Purlins In Revit Roof Trusses Roof Truss Design Roof

Roof Cutoff Level Youtube

The floor plan cut the model at elevation 1200 mm but the windows sill height are at 1700 mm.
Revit cut roof at height.

Revit Conceputal Massing 04 Wall Roof By Face Revit Tutorial Autodesk Revit Mass

Solved Joining Roofs Higher Roof To Lower Roof Autodesk Community Revit Products

Revit Tutorial Understanding Your Roof Eaves Soffits Therevitkid Com Tutorials Tips Products And Information On All Revit Tutorial Roof Eaves Roof

Revit Roof Basics 04 Intersect By Roof Join Cadclips Youtube
Source : pinterest.com
