Create the walls and roof elements that make up the dormer.
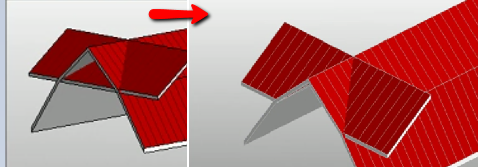
Revit cut extruded roof.
Revit makes both vertical and horizontal cuts in the roof.
The bad thing about extruded roofs is the fact you can t follow along with the footprint of your building the good thing is we can do something about that the objective of this video is to go to the plan view we will then create a void where our walls jag in and out this is going to allow revit to cut the roof properly in plan to get started jump into your revit roofs.
For the purposes of this tutorial i am going to use the following simple building.
We will delve into great detail on each later on but to start let s look at the standard roof by footprint workflow.
Join eric wing for an in depth discussion in this video trimming an extruded roof part of building roofs with revit.
Family and parameters family category select roofs or whichever type requires a cut provide a name for the void select extrusion or alternative from forms draw profile for the extrusion and provide depth value properties for the extrusion identity data select void use cut geometry tool to cut the void.
There are 3 primary sub tools that you can use to model roofs in revit roof by footprint roof by extrusion and roof by face.
Dormer opening in a 3d view.
After adding a dormer cut an opening for it through the roof.
Modelling roofs is no different.
By using our dwg we find the slopes of two roof lines and their elevations for the rafter cut a simple two line.
In revit there are multiple ways to approach a modelling exercise.
Architecture tab opening panel dormer opening highlight the main roof on the building model and click to select it.
If you d like to learn everything about revit roofs you may be interested in my revit roofs masterclass course.
If the roof is extruded open an elevation view.
Open a plan view or an elevation view in which you can see the dormer roof and the attached walls.
If the roof is extruded open an elevation view.