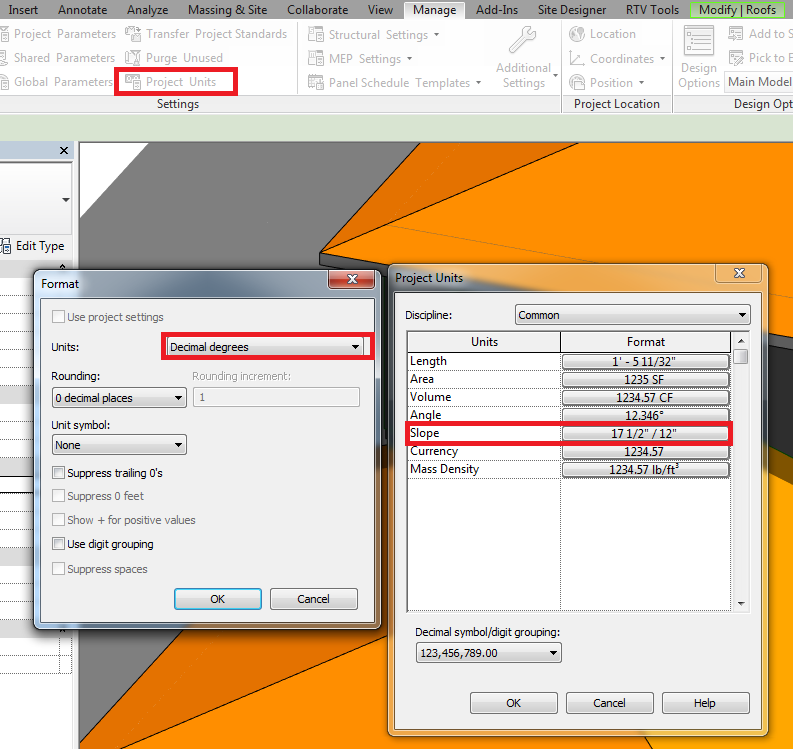
Revit Change Roof Slope From Arrow To Ratio
How To Set Up The Dimension For Roof Slope In Degree Revit Products Autodesk Knowledge Network

About Slope Arrows Revit Products 2019 Autodesk Knowledge Network

Add A Spot Slope Dimension Revit Products Autodesk Knowledge Network

Create A Roof Slope Using The Defines Slope Property Revit Products 2018 Autodesk Knowledge Network

Imagem Relacionada Simbolos Arquitetura Detalhamento Arquitetura Diagramas De Arquitetura

Create A Sloped Surface Using A Slope Arrow Revit Lt 2018 Autodesk Knowledge Network
In the type selector select the type of spot slope to place.
Revit change roof slope from arrow to ratio.
Custom Slope Symbol

Toilet Block Detail Male Female Toilet Design Toilet Designs To Draw

News In Naviate Architecture Versions 2019 1 9 2020 1 3 Naviate Com

Use The Slope Editor Revit Products 2019 Autodesk Knowledge Network
Source : pinterest.com
